
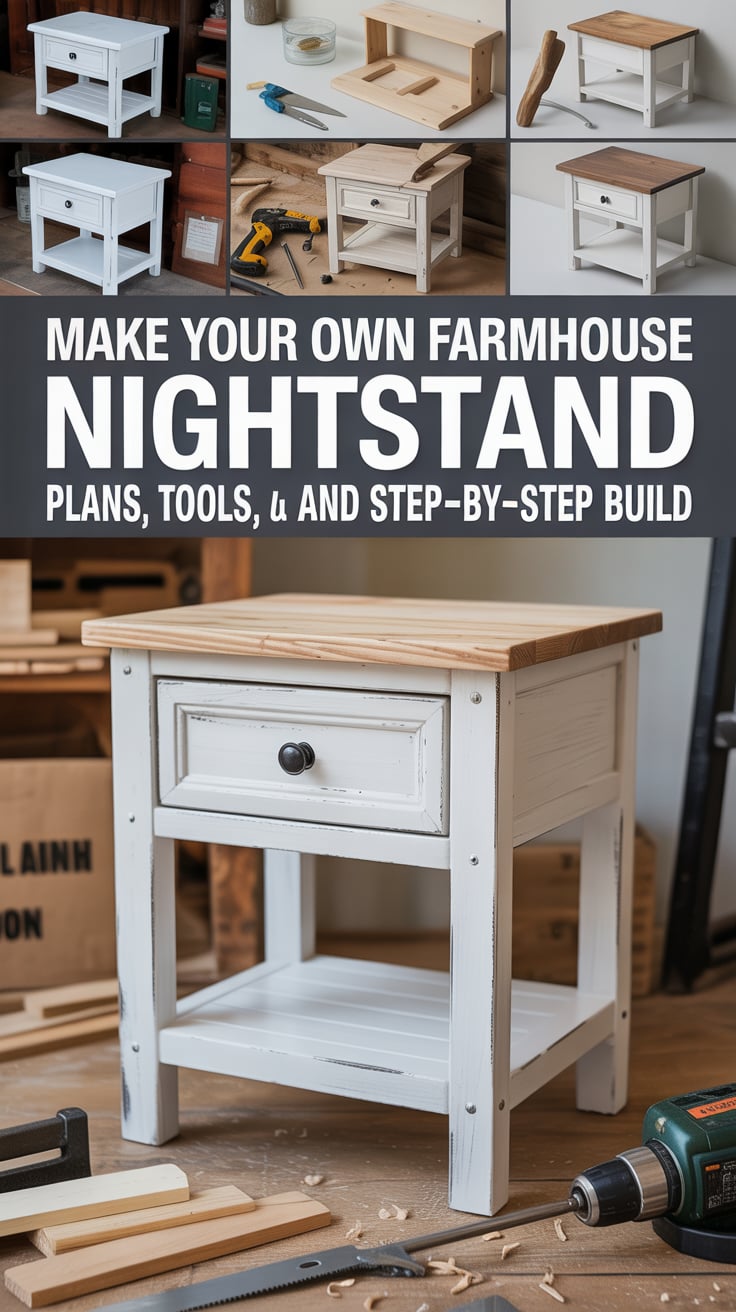
A farmhouse nightstand blends rustic character with everyday utility—and it’s a perfect weekend build whether you’re a beginner or an experienced maker. In this complete guide, you’ll learn how to make your own farmhouse nightstand from planning and cut lists to joinery, drawers, and a durable farmhouse finish. You’ll also find tool tips, optional upgrades, and fixes for common hiccups so you get a crisp, sturdy result that looks store-bought.
Kickstart your build with a printable plan library and step-by-step drawings from TedsWoodworking to stay organized and avoid costly mistakes.
Table of Contents
Project overview and dimensions for a farmhouse nightstand
Before you pick up a saw, decide the size and storage layout. A classic farmhouse nightstand pairs a chunky top with clean shaker lines, framed panels, and sturdy legs. A proven, bed-friendly size:
- Height: 26–28 inches (aligns with most mattress heights)
- Width: 18–22 inches (scale to room; wider for king beds)
- Depth: 16–18 inches (deep enough for a lamp and book)
Typical storage configurations:
- Open shelf + drawer: Breezy and easy to clean; perfect for baskets and books.
- Drawer + cabinet door: Extra concealment for chargers and nighttime clutter.
- Two drawers: Maximum organization with minimal dust.
Core parts you’ll build:
- Solid top: Either a glue-up of boards or a single panel.
- Leg structure: Four legs with side and back aprons; optional X-brace or slatted shelf for farmhouse flair.
- Case box or face frame: Provides strength and square reference.
- Drawer(s) and/or cabinet door: Inset or overlay, depending on your taste.
- Back panel: Adds racking resistance and a clean finish.
Style choices for farmhouse character:
- Top overhang: 1 inch on sides and front (adds presence).
- Face frame with 1.5–2 inch stiles/rails: A classic shaker cue.
- Planked shelf or X-brace sides: Rustic visual interest without fuss.
- Finish: Warm stain with a matte clear coat, or a painted body with a stained top.
Tools, hardware, and wood selection
A farmhouse nightstand doesn’t require exotic tools—just a reliable set and a safe workspace. Choose the best tools you can afford and keep them tuned.
Essential tools:
- Saw: Table saw or circular saw with a straightedge guide for ripping and crosscutting.
- Miter saw: Speed and accuracy for consistent parts.
- Drill/driver: Pre-drill, drive screws, and pocket holes.
- Pocket hole jig or dowel jig: Simple, strong joinery options.
- Router (optional): Roundovers, chamfers, and rabbets.
- Sander: Random-orbit, 120–220 grits for smooth surfaces.
- Clamps: 6–10 is plenty; mix of F-style and bar clamps.
- Squares and measuring: Tape, combination square, marking knife, and pencil.
Hardware and consumables:
- Screws: 1 1/4–1 5/8 inch for carcass and face frames.
- Pocket hole screws: Coarse for softwoods, fine for hardwoods.
- Drawer slides: 14–16 inch side-mounts are budget-friendly.
- Hinges (if using a door): Simple face-frame or inset hinges.
- Wood glue and wood filler.
- Finishes: Pre-stain conditioner, stain or paint, topcoat (polyurethane or waterborne poly).
Wood choices:
- Budget-friendly: Pine or poplar. Easy to work, classic farmhouse look.
- Mid-range: Red oak or ash for visible grain and durability.
- Premium: Maple for a refined, painted finish; walnut for a modern farmhouse mix.
Safety first:
- Eye, ear, and dust protection should be non-negotiable.
- Keep blades and bits sharp to reduce kickback and tearout.
- Review safe shop practices at OSHA Woodworking Safety.
Space-saving note: A small, well-organized shop is more productive than a cluttered garage. Plan your tool layout, dust collection, and workbench workflow early to save time later. If you’re setting up in a tight space, revisit organizing strategies before you cut your first board.
Cut list and milling workflow
Every good build starts with consistent, square parts. Even if you don’t own a jointer or planer, you can produce accurate components with careful sequencing.
Example cut list (adjust to your design):
- Legs (4): 1 1/2 x 1 1/2 x final height (e.g., 1.5 x 1.5 x 27 inches)
- Side aprons (2): 3/4 x 3 x 14–16 inches
- Back apron (1): 3/4 x 3 x 16–18 inches
- Side panels or slats: 3/4 x 6–8 inches wide to span between legs
- Bottom shelf (optional): 3/4 x width x depth minus leg thickness
- Top boards (2–3 pieces): 3/4 x required width to glue up a top with 1-inch overhang on three sides
- Face frame stiles (2): 3/4 x 1.5–2 x case height
- Face frame rails (2–3): 3/4 x 1.5–2 x case width
- Drawer parts (box sides, front, back): 1/2–5/8 stock; height depends on opening
- Drawer front (false front): 3/4 panel sized for equal reveals
- Back panel: 1/4 plywood cut to fit
Milling sequence:
- Rough cut: Break down long boards into manageable lengths 1–2 inches over final.
- Straighten edges: With a jointer or a straightedge and circular saw; then rip to width on the table saw.
- Thickness and square: Plane to even thickness if possible; check for square, and mark “reference” faces and edges.
- Final dimension: Crosscut to length using a stop block for repeatability.
- Glue-ups: Edge-glue top boards; clamp snugly with cauls to keep flat. Let cure fully before scraping/sanding.
Label everything. Use painter’s tape on parts for “front,” “up,” and “left/right” to keep orientation consistent through assembly. Reference lines protect you from mirrored mistakes.
Carcass and leg assembly for authentic farmhouse style
This is where your nightstand takes shape. Choose a joinery approach that balances strength, speed, and your tool set.
Approach A: Face frame + panels
- Build the face frame first using pocket holes or dowels. Keep stiles and rails flat to your bench and clamp across joints as you drive fasteners.
- Dry fit the face frame to the legs and aprons; the frame becomes your visual reference for door/drawer reveals.
- For a farmhouse look, set the face frame proud by about 1/16 inch, or flush it for a crisp shaker effect.
Approach B: Aprons + slatted shelf
- Join legs with side and back aprons. Use pocket holes drilled in the aprons, aiming screws toward legs; add glue at the joints.
- Install a lower shelf between legs. A planked shelf (three to five boards) reads instant farmhouse. Leave tiny expansion gaps between slats.
Farmhouse elements to consider:
- X-brace on sides: Cut two thin strips, miter at the center, and attach with glue/brads into the aprons and legs.
- Bead or chamfer: Soften face frame and top edges with a small roundover or chamfer bit.
Squaring tactics:
- Assemble on a flat surface; measure diagonals and adjust clamps until both match.
- Add the back panel early (1/4-inch plywood set into a shallow rabbet or simply tacked) to lock the case square.
Check alignment:
- Confirm the opening for drawers or door is square by comparing diagonals and using a reliable square.
- Test-fit the top to confirm overhang and reveal before sanding edges.
If you’re working in a tight garage or shared space, save setup time and headaches with small-shop strategies from UltimateSmallShop – The Next Woodworking Blockbuster!.
Build the top, drawers, and door
The top
- Glue up two or three boards for a 3/4-inch top. Joint or straight-edge rip and align grain for a seamless look.
- Clamp with light, even pressure; use cauls if needed to keep it flat.
- After curing, scrape glue lines, sand 120–180 grit.
- Optional: Add breadboard ends for a traditional farmhouse detail. Float the center panel; secure with elongated screw holes to allow movement.
Attaching the top
- For solid wood, use figure-8 fasteners or Z-clips to allow seasonal movement while keeping the top snug to the base.
- Aim for a 1-inch overhang on front and sides; flush or slight overhang at the back.
Drawers
- Use 1/2–5/8-inch stock for drawer boxes. Cut sides to length and assemble with pocket screws, dowels, or simple rabbet joints. Glue the bottom panel into a groove or staple onto the underside for a utility build.
- Install slides: Mark centerlines, shim for consistent reveals, and fasten the slides to the case first, then the drawer. Detailed walkthrough: The Family Handyman: Install Drawer Slides.
- Fit the false front: Center it with even reveals, use playing cards as shims, then fasten from inside the drawer box.
Doors (if you choose a door + drawer layout)
- Shaker door: Rails and stiles with a flat panel. Keep the panel floating (no glue in grooves) to avoid cracking.
- Hinges: For face-frame cabinets, pick simple surface-mount or inset hinges. Pre-drill carefully to avoid splitting.
- Magnetic catch: Adds a satisfying, secure close.
Hardware and alignment
- Pre-drill for pulls and knobs with a hardware jig or a self-made template to ensure both sides match.
- Confirm that drawers slide smoothly and the door doesn’t rub at any point; adjust as needed.
Finishing to make your own farmhouse nightstand look timeless
A farmhouse finish is equal parts prep, color, and feel. Work dust-free and patient, and your nightstand will look as good as it is strong.
Surface prep
- Sand to 180–220 grit. Don’t oversand edges; your finish needs some “tooth.”
- Break sharp corners with a light hand sanding—this reduces finish burn-through and feels better to the touch.
- Vacuum and tack cloth between grits to remove dust.
Color options
- Classic two-tone: Stained top + painted base. It’s a hallmark farmhouse combo.
- Warm stain: Honey, provincial, or walnut for rustic depth.
- Painted body: Whites, creams, or muted greens/blues give a cozy, collected look.
Distressing techniques (optional)
- Edge wear: Lightly sand through paint on corners for a subtly worn look.
- Dents and dings: Tap gently with a chain or rounded screw to create natural imperfections; go sparingly.
- Glaze or dark wax: Accentuates crevices and profiles. Practice first on scrap.
- Learn more methods at Popular Woodworking: Distressing Techniques.
Finish schedule examples
- Stained top + clear coat: Pre-stain conditioner (softwoods), stain, then 2–3 coats of oil or waterborne polyurethane. Sand lightly between coats.
- Painted base: Quality primer, two coats of furniture paint, optional glaze/wax, then a protective topcoat for durability.
- Milk paint or chalk-style paint: Low-sheen, forgiving, and authentically rustic.
Durability and safety
- Choose low-VOC finishes if working indoors or in winter.
- Let finishes cure fully before heavy use; a week is a good comfort window.
- Solid wood moves—attach tops with movement in mind. For a deeper dive, see Fine Woodworking: Understanding Wood Movement.
Styling, upgrades, and troubleshooting
Styling ideas
- Baskets on an open shelf add texture and conceal clutter.
- Pair with a vintage-style lamp and a woven runner to emphasize warmth.
- Mix metals: Matte black pulls with antique brass lamp for layered charm.
Smart upgrades
- Hidden charging: Drill a 1-inch grommet hole at the back; run a surge protector inside a drawer or behind a door.
- Soft-close slides and hinges: Worth the splurge for a premium feel.
- Felt pads: Protect floors and help the nightstand glide during cleaning.
Common mistakes and fixes
- Rocking or racking: Check for square, then shim under one leg or adjust the back panel. Verify floor level too.
- Drawer bind: Confirm the box is square, slides are co-planar, and face frame openings are consistent. A thin washer behind a slide can correct alignment.
- Blotchy stain on softwood: Use a pre-stain conditioner and sand no finer than 180 before staining.
- Paint brush marks: Try a high-quality synthetic brush, add a conditioner, or roll and tip with a foam roller.
Customization paths
- Change proportions for a taller mattress; add 1–2 inches of leg height and keep top thickness consistent for balance.
- Swap in an X-brace side or planked door for more rustic detail.
- If you love the build, batch a pair and keep one as a template for quick replication.
Selling your work
- Nightstands are great sellers because they ship or carry easily and fit small apartments. Photograph in natural light and keep finishes neutral.
Recommended plans and resources
- TedsWoodworking — A huge library of furniture plans and diagrams. Use it to grab a printable farmhouse nightstand plan and avoid trial-and-error.
- UltimateSmallShop – The Next Woodworking Blockbuster! — Practical shop setup blueprints for tighter spaces, tool prioritization, and workflow that saves time on every build.
- My Shed Plans — If you’re eyeing a backyard shed shop or storage upgrade, these plans help you design the outbuilding that fits your tools and projects.
Get a printable plan and cut list
If you prefer working from a clear, printable plan with exploded diagrams and cut lists, grab one from TedsWoodworking. It’ll streamline layout, joinery choices, and finishing steps so you can confidently make your own farmhouse nightstand on your next free weekend.
Conclusion
You’re ready to make your own farmhouse nightstand—complete with a sturdy frame, a handsome top, organized storage, and a finish that suits your home. With careful planning, square cuts, and patient finishing, this is a rewarding, skill-building project that looks great on both sides of the bed. When you’re ready to expand, tweak dimensions, swap in different farmhouse details, or batch a pair. Start with a solid plan, work safely, and you’ll have a nightstand that earns compliments for years.
Frequently asked questions
What size should I build to make my own farmhouse nightstand?
Aim for 26–28 inches tall, 18–22 inches wide, and 16–18 inches deep. Match height to your mattress top and scale width to your room and bed size.
What wood is best for a farmhouse nightstand?
Pine and poplar are affordable and paint or stain well. Oak and ash offer bold grain and durability. Maple and walnut are premium options for a refined look.
How do I attach a solid-wood top so it doesn’t crack?
Use figure-8 fasteners or Z-clips so the top can expand and contract seasonally. Avoid gluing or screwing the top rigidly across the grain.
Are pocket holes strong enough for this build?
Yes. For nightstands, pocket hole joinery with glue is plenty strong. Use coarse-thread screws for softwoods and fine-thread for hardwoods. For a traditional build, upgrade to mortise-and-tenon.
Should I paint or stain a farmhouse nightstand?
Both work. A painted base with a stained top is a classic farmhouse combo. If staining softwoods, use pre-stain conditioner to avoid blotches.