
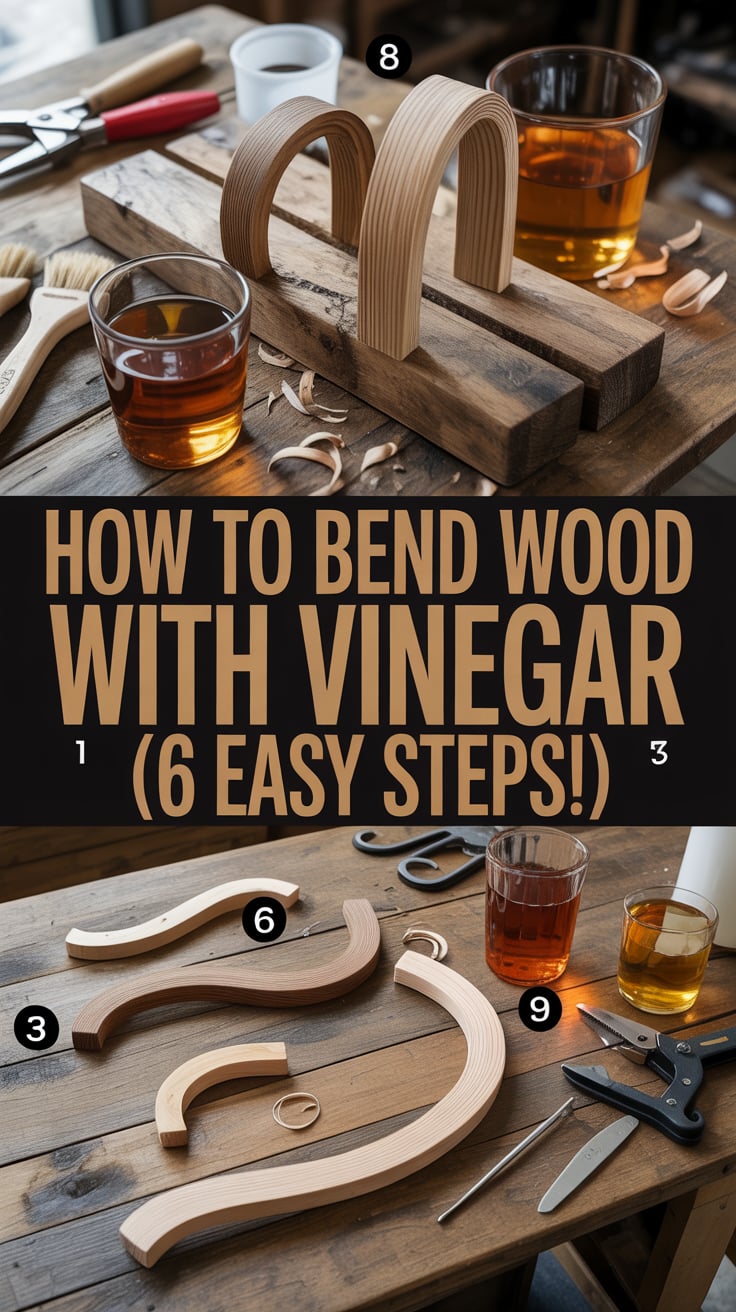
Vinegar won’t replace a steam box, but it can make certain woods more flexible and forgiving during a bend—especially thin strips for curved trim, handles, and decorative work. In this guide, you’ll learn exactly how to bend wood with vinegar in six practical steps, plus smart tweaks that combine vinegar conditioning with heat for reliable, crack‑free curves. You’ll also see how to choose the right species, build a bending form, and lock in the bend for clean results.
If you’re planning curved furniture parts or jigs that demand accurate arcs, detailed plans can save hours of trial and error. Explore 16,000+ templates with TedsWoodworking to jumpstart your project list.
Table of Contents
Understanding vinegar bending and when to use it
Vinegar (5% acetic acid) helps plasticize wood fibers mildly, making them more pliable for short, gentle curves—especially when paired with heat or steam. The acetic acid partially penetrates the surface and can soften hemicelluloses in the cell walls, while raising moisture content and lubricating the bend. The effect is modest compared to steam bending, but for many home and small‑shop tasks, it’s enough to get smooth curves in thin stock with less cracking.
What vinegar bending is good for:
- Thin strips and laminations (e.g., 1/16–1/4 in or 1.5–6 mm)
- Tight-ish radii in forgiving species like white oak, ash, hickory, beech, and walnut
- Small curved parts: drawer pulls, chair backs, rims, trim, craft projects
What vinegar bending is not ideal for:
- Very thick stock (e.g., over 3/4 in / 19 mm) without lamination
- Extremely tight radii on brittle species (e.g., maple, cherry) without heat backing and a strap
- Structural members needing maximum strength retention beyond the bend
The science and limits:
- Steam remains the gold standard for dramatic bends because it heats the lignin sufficiently to allow plastic deformation. Vinegar alone doesn’t reach that temperature zone unless paired with hot water or steam.
- You can expect modest springback (the wood tries to straighten). Use a good bending form and let the piece dry thoroughly on the form to minimize springback.
- Always test scrap from the same board. Wood varies by species, growth rate, and grain quality.
Safety and compatibility:
- Household white vinegar is typically 5% acetic acid; don’t use higher concentrations without additional PPE.
- Vinegar can corrode mild steel surfaces—use plastic containers and protect metal clamps where possible.
- Wear gloves and eye protection when working with acid and hot liquids. See OSHA’s guidance on acetic acid exposure and safe handling for more detail (OSHA/NIOSH acetic acid resources).
Useful reading:
- The Wood Handbook by the USDA Forest Products Laboratory provides foundational wood behavior insights (USDA FPL).
- The Wood Database offers species‑specific information, including bending properties (The Wood Database).
Step 1: Choose the right species, grain, and thickness
Your choice of wood determines 70% of your success. Vinegar assist or not, some woods bend beautifully; others love to crack.
Best candidates:
- Ring‑porous hardwoods like white oak and ash are classic bending species. They have favorable cell structures for plastic deformation.
- Hickory, beech, and walnut can also bend well with proper technique.
More challenging woods:
- Maple and cherry often require extra care, thinner stock, and a heat/steam assist.
- Softwoods vary: straight‑grained, slow‑grown pieces of fir or pine can bend gently but are prone to compression buckling on tight radii.
Grain orientation:
- Choose straight, clear grain with no knots, run‑out, or wavy grain in the bend zone. Grain run‑out is a crack waiting to happen.
- Quarter‑sawn or rift‑sawn pieces often behave more predictably than flat‑sawn for bend stability, but test both orientations for your project.
Thickness guidelines:
- For vinegar‑assisted bending without heavy heating, aim for thinner stock: 1/16–1/8 in (1.5–3 mm) is easy; 1/4 in (6 mm) is doable with heat and a strap; thicker material is best laminated.
- Laminations are your friend. Instead of bending a single 3/4‑inch board, rip it into multiple thin plies, bend them together on the form, and glue them up.
Moisture content:
- Air‑dried stock around 12% MC bends a bit more easily than kiln‑dried at 6–8%. If starting with very dry stock, vinegar soaking raises surface moisture and helps flexibility.
Project planning tip:
- Map your curve radius, width, and length on a full‑scale template. Flag the tightest radius and ensure your wood choice and thickness respect that limit.
Step 2: Prepare the stock cleanly and safely
Good prep prevents tear‑out and compression wrinkles during the bend.
Milling and edge prep:
- Rip to final width with a sharp blade, ensuring edges are square and clean. Any roughness on the tension side (outside of the bend) can initiate a split.
- Plane or sand faces smooth. If laminating, a light pass right before glue‑up ensures tight, gap‑free adhesion after the bend.
- Ease the outside corners slightly (a tiny 1/64 in chamfer). Sharp arrises are more likely to splinter as fibers stretch.
Marking orientations:
- Mark the intended outside of the curve, the grain direction, and a centerline. Consistency matters once the vinegar soak darkens or raises the grain slightly.
Cut long and trim later:
- Add extra length at both ends to accommodate clamp marks and any minor crushing. You can cut clean final ends once the bend is set and dry.
Shop setup:
- Prepare a clean soaking container (plastic trough, PVC pipe, or a long food‑safe bin).
- Protect metal surfaces from vinegar splashes. Vinegar can slowly dull or tarnish certain metals.
- Gather clamps (F‑style, bar clamps), a bending strap if you have one, and your bending form. If you don’t have a strap, a thick steel or aluminum strip with end blocks works well.
Safety basics:
- Wear gloves and eye protection.
- Keep ventilation moderate; household vinegar is mild but the odor can build up.
Pro tip:
- When in doubt, laminate. Thin plies behave kindly, and the final glue‑laminated piece can be stronger and more stable than a single thick bent board. If you’re short on space or tools, UltimateSmallShop – The Next Woodworking Blockbuster! can help you plan a compact, efficient shop that handles bending jigs and glue‑ups with ease.
Step 3: Mix the vinegar solution and pre‑soak the wood
Household white vinegar is 5% acetic acid—enough for a useful conditioning soak without harming fibers when used sensibly.
Solution options:
- Full‑strength soak: Pour white vinegar straight into a plastic trough. This gives the strongest softening effect for thin strips and tough species.
- Diluted soak: Mix 1:1 vinegar to water for milder species or thin laminations where minimal odor and less acid exposure are desired.
Soak times (guidelines; always test offcuts first):
- Very thin strips (1/16 in / 1.5 mm): 30–60 minutes.
- Thin to moderate (1/8 in / 3 mm): 1–3 hours.
- Quarter inch (6 mm): 3–6 hours, then bend with heat assist.
- Over 1/4 in: consider laminating instead, or plan on steaming post‑soak.
Agitation and penetration:
- Submerge fully and weigh down the piece so it stays underwater. Flip or gently agitate every 30 minutes for more even conditioning.
- Expect a slight darkening or raised grain on some species. This is normal and will sand out later.
Odor management:
- Vinegar smell dissipates as the piece dries, but it can linger in a closed shop. Keep a fan running, and allow good ventilation during and after the soak.
- For metal clamp hardware, wipe off any vinegar residue to reduce corrosion risk.
Heat synergy:
- Vinegar alone helps, but heat is the real unlock. After soaking, use a hot water bath, steam, or a heat gun to warm the bend area to around 180–212°F (82–100°C) before forming. Heat mobilizes lignin and reduces fiber fracture on the tension side.
Safety note and sources:
- Always handle acids responsibly (see OSHA/NIOSH guidelines for acetic acid).
- For more on species‑level variability, check The Wood Database for bending notes on oak, ash, and hickory.
Step 4: Build a reliable bending form and choose a strap
A good form is your insurance against kinks, wrinkles, and unpredictable springback.
Form fundamentals:
- Backer: Use 3/4‑inch plywood or MDF in multiple layers. Stack and screw layers to achieve the thickness needed to capture the full width of your piece plus room for clamps.
- Layout: Draw your curve full size. Use a fairing batten or flexible strip to achieve a smooth, continuous arc; avoid sudden changes in radius.
- Overbend: Expect springback. Overbend the form slightly (often 10–15% depending on species and thickness). You can fine‑tune by testing a scrap strip.
- Face: Add a smooth hardboard or UHMW face to reduce friction and improve the surface contact.
Stop blocks and cauls:
- Add a stop block at the start of the bend to anchor one end of your strip.
- Prepare matching cauls (curved clamping blocks) covered with packing tape to prevent sticking and to spread clamping pressure evenly.
Bending strap:
- A metal strap on the outside of the bend contains the tension and prevents fibers from tearing. You can buy a dedicated bending strap with end stops or make one from aluminum/steel flat stock with end blocks.
- If you don’t have a strap, at least use wide cauls to distribute pressure and clamp more closely together along the curve.
Dry runs:
- Do a full rehearsal without vinegar or heat. Practice clamp placement and timing. Mark clamp positions on the form.
- Keep a damp towel and heat gun or steam source ready if you’re combining heat with the vinegar method.
Mid‑project help:
- If you’d like ready‑made templates for curves and jigs, TedsWoodworking includes many bending forms, jigs, and furniture parts you can adapt without starting from scratch.
- For building custom forms, see this resource on layout techniques and springback calibration at Fine Woodworking (FineWoodworking).
Step 5: Apply heat and make the bend cleanly
Combining vinegar conditioning with heat provides the best results for most species and thicknesses.
Three practical heating options:
- Hot water bath
- After the vinegar soak, transfer the strip into 160–180°F (71–82°C) hot water for 10–20 minutes.
- Benefits: gentle, uniform heating; minimal setup.
- Proceed quickly from hot bath to the bending form to maintain heat.
- Steam assist
- Steam the vinegar‑soaked strip for 20–45 minutes depending on thickness (roughly 1 hour per inch of thickness, with adjustments for thin stock).
- Benefits: the gold standard for plasticizing lignin and minimizing breakage.
- Tip: A simple PVC or plywood steam box with a garment steamer or kettle works.
- Localized heat gun
- For small bends or touch‑ups, direct a heat gun while slowly forming the curve. Keep the gun moving to avoid scorching.
- Benefits: precision on small parts.
- Drawback: less uniform than bath/steam; watch for hot spots.
Bending technique:
- Anchor the strip at the stop block with the strap on the outside (tension side).
- Start bending gradually, applying clamps in sequence along the curve. Keep the strap in close contact as you work to confine the tension.
- If the strip resists, pause and reheat the stubborn area, then continue. Patience prevents fractures.
Avoiding common defects:
- Compression wrinkles on the inside curve: Use end‑blocked straps to limit compression or add a compressible backer (thin cork or rubber) and apply close clamp spacing.
- Tension fractures on the outside: Tighten the strap, increase heat, or reduce thickness.
- Sudden kinks: Always keep the piece supported against the form; don’t free‑bend beyond a gentle flex.
Clamping sequence:
- Work from the anchored end along the curve.
- Use cauls as needed to spread pressure and maintain full contact between the strip and the form.
- Check alignment marks to ensure the curve is centered and consistent.
Note:
- Some vinegar may squeeze out during the bend. Wipe promptly, especially near metal hardware, to reduce corrosion risk.
Step 6: Clamp, dry, and set the curve for lasting results
Drying is where many bends fail—rushing this stage can cause springback, twist, or hairline fractures that show up later.
On‑form drying:
- Keep the piece clamped in the form until its moisture content returns near shop equilibrium (often 48–72 hours for thin stock; longer if thicker or humid).
- If you used a hot water or steam assist, expect more moisture. Good airflow is important—use fans but avoid high heat that could cause uneven drying and warping.
Neutralizing odor and acidity:
- Once the bend is set and dry to the touch, you can wipe the surface with a mild baking‑soda solution (1 teaspoon baking soda per quart/liter of water) to neutralize residual acidity and reduce odor. Don’t soak—just a damp cloth wipe. Then wipe with clean water and allow to dry again.
- This step is optional. Most vinegar smell dissipates naturally. If you plan to glue laminations post‑bend, ensure the surface is neutral, dry, and lightly sanded for best adhesion.
Managing springback:
- If the part springs back more than expected, overbend slightly on the form during the next attempt or leave it clamped longer.
- Laminations: If you’re gluing multiple plies, apply glue while the strips are hot/moist from the heat stage, then clamp to the form and let the cured laminate lock in the curve. Use adhesives compatible with moisture (e.g., plastic resin glue or appropriate PVA) and allow full cure time per manufacturer instructions.
Inspect and tune:
- After unclamping, check for flatness, twist, and any compression marks. Light sanding or scraping usually removes minor artifacts.
- If you see fractures, reduce thickness or increase heat next time, and consider a higher‑quality strap or a larger radius.
Finish prep:
- A quick pass with 180–220 grit cleans raised grain from vinegar/heat exposure.
- Seal end grain on thin parts to prevent rapid moisture changes that can relax the curve.
Reference: Fine Woodworking and the USDA Wood Handbook offer guidance on springback and drying behaviors in bent wood (FineWoodworking; USDA FPL).
Step 7: Finish, assemble, and troubleshoot like a pro
You’ve set the curve—now protect it, integrate it into your project, and bank the lessons learned.
Finishing options:
- Film finishes (varnish, shellac, lacquer) lock fibers and can help stabilize the curve. Apply thin, even coats, sanding lightly between them.
- Oil finishes enhance grain but add less structural stability. Consider a topcoat for better environmental resistance.
- If you used water or steam, raise the grain intentionally before final sanding and finishing: wipe with a damp cloth, let dry, then sand lightly. This prevents later roughness after finishing.
Odor control:
- Vinegar odor fades quickly as the piece dries and is sealed. If it lingers, ensure the part fully air‑dries before finishing, and consider the mild baking‑soda wipe mentioned above.
Assembly:
- Dry‑fit assemblies to ensure curved parts align with mating components. Use cauls during glue‑up to maintain the curve and avoid clamp dents.
- For mechanical fasteners, pre‑drill to avoid splitting on the outside radius.
Troubleshooting:
- Crack during bending: Reduce thickness, improve strap support, increase heat, or choose a more bend‑friendly species.
- Excess springback: Overbend more, dry longer on the form, or switch to lamination with glue cure on the form.
- Surface buckling: Add compressible backers on the inside curve or use an end‑blocked strap to control compression.
Scaling up:
- For repeated parts (chair backs, frames), build a robust, repeatable form and jig set. Label clamp points and use stop blocks to speed production.
- Consider making multiple thin laminations instead of one thick bend. It’s consistent and strong, and it uses common shop tools.
Mid‑content resource:
- If your shop needs better workholding and clamp storage for bending forms, UltimateSmallShop – The Next Woodworking Blockbuster! shows how to design a compact, efficient layout with budget‑friendly tool choices.
Further reading and references:
- USDA Forest Products Laboratory: Wood Handbook (USDA FPL)
- The Wood Database: species bending characteristics (The Wood Database)
- Fine Woodworking: templates, jigs, and bending techniques (FineWoodworking)
Recommended resources to plan curved projects
- TedsWoodworking: A vast library of plans, including curves, jigs, and furniture parts that benefit from bending. Great for finding bend‑friendly designs and form templates.
- UltimateSmallShop – The Next Woodworking Blockbuster!: Practical shop layouts and tool setups for small spaces—perfect for steam boxes, long forms, and safe clamping areas.
- WoodProfits: Guidance on turning woodworking into a side income, including batch production of curved parts.
- My Shed Plans: Plans to build or expand shop space for larger bending forms and drying racks.
Call to action for your first vinegar‑assisted bend
Choose a forgiving species like white oak, rip two or three thin strips, and build a simple bending form for a 12–18‑inch radius. Condition the strips in vinegar, warm them with hot water or steam, and clamp them in sequence with a bending strap. Once dry, you’ll have a clean curve ready for a tray handle, stool rail, or frame element. If you want a ready‑made project that uses bent parts, browse TedsWoodworking and pick a plan that matches your tools and space.
Conclusion
Learning how to bend wood with vinegar is about smart prep, the right species, and pairing mild acid conditioning with heat. Use straight‑grained stock, soak appropriately, apply a bending strap, and clamp on a well‑designed form. Let the piece dry thoroughly to lock in the shape, and consider laminations for predictable, repeatable results. With these six easy steps, you can integrate graceful curves into furniture and small projects without a complex setup—and you’ll have the confidence to scale up to steam‑assisted bends when needed.
FAQ
Does vinegar really help bend wood?
Yes—household vinegar mildly softens wood fibers and raises moisture content, making thin strips more pliable. For best results, combine vinegar with heat (hot water or steam) and use a bending strap.
How long should I soak wood in vinegar before bending?
For thin strips (1/16–1/8 in), 30 minutes to 3 hours is common. Thicker pieces may need longer but are better handled as laminations. Always test scrap first.
What woods bend best with vinegar?
White oak, ash, hickory, beech, and walnut respond well. Maple and cherry can work with thinner stock, added heat, and a bending strap. Always choose straight, clear grain.
Can I bend plywood with vinegar?
Thin plywood can bend, but cross‑ply construction limits tight radii and increases springback. Bending ply (with special face veneer orientation) is better. Solid‑wood laminations often outperform standard plywood for tight curves.