
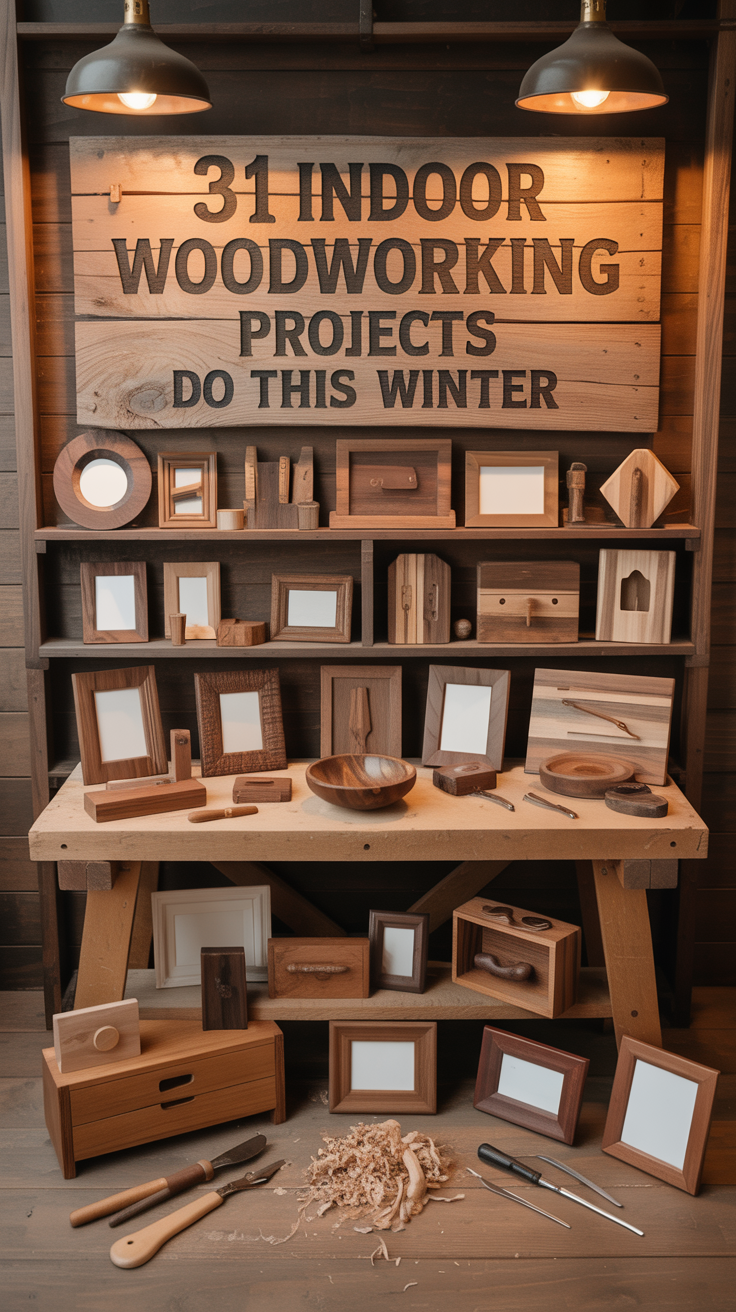
Staying creative through the colder months is easy when your shop moves indoors. This list of 31 indoor woodworking projects to do this winter ranges from quick gifts and décor to useful home upgrades and shop jigs. Whether you have a compact apartment setup or a full basement shop, you’ll find builds that fit your tools, time, and skill level—and that keep sawdust flying while the snow falls.
If you want ready-to-build plans with measured drawings and cut lists for nearly every project category below, check out TedsWoodworking for a huge library of step-by-step designs.
Tip before you start: Indoor finishing requires good ventilation. Choose low-VOC options and consider setting up a small fan near a cracked window.
Table of Contents
Quick wins to start your indoor woodworking projects
These projects are compact, require minimal lumber, and can be completed in a weekend or even an afternoon. They’re ideal for tuning up your tools and working smart in small spaces.
1) Edge-grain cutting board
- Why it’s great: A classic beginner-friendly build with stylish grain patterns. Perfect as a gift or for your kitchen.
- Materials & cuts: Hard maple, walnut, or cherry; strips ripped to uniform width.
- Joinery & tools: Glue-up with parallel clamps; plane/sand flat.
- Finishing tips: Mineral oil and beeswax for a food-safe finish.
- Time & difficulty: 3–5 hours; beginner.
2) Hardwood coasters set
- Why it’s great: Uses offcuts, teaches repeatable cutting and edge treatment.
- Materials & cuts: 4″ x 4″ squares; optional cork backing.
- Joinery & tools: Round over edges with a trim router; add inlay strips if desired.
- Finishing tips: Wipe-on polyurethane or hardwax oil.
- Time & difficulty: 2–3 hours; beginner.
3) Simple picture frame
- Why it’s great: Learn precise miters and splines; frames add warmth to any room.
- Materials & cuts: 1×2 hardwood; miters at 45 degrees.
- Joinery & tools: Miter saw or shooting board; spline jig optional.
- Finishing tips: Stain to match décor; use acrylic glazing for lightweight frames.
- Time & difficulty: 2–4 hours; beginner.
4) Wall-mounted coat rack
- Why it’s great: Instant entryway upgrade; combine hooks with a hardwood backer.
- Materials & cuts: 1×6 board to length; 4–6 hooks.
- Joinery & tools: Keyhole slots or French cleat for mounting.
- Finishing tips: Durable satin poly against abrasion.
- Time & difficulty: 2–3 hours; beginner.
5) Two-step utility stool
- Why it’s great: Small footprint, lots of use in the kitchen or shop.
- Materials & cuts: 3/4″ plywood or 1x boards; tread openings optional.
- Joinery & tools: Pocket screws or dowels; add anti-slip pads.
- Finishing tips: Tough waterborne poly; consider rubber treads.
- Time & difficulty: Half a day; beginner to intermediate.
For tool setup and safe indoor workflows, check OSHA’s guidance on woodworking eTool safety fundamentals.
Beautiful storage solutions for every room this winter
Winter is perfect for decluttering. These indoor woodworking projects focus on shelves, cabinets, and organizers that add storage without eating floor space.
6) Floating shelves
- Why it’s great: Minimalist storage that displays books, plants, or décor.
- Materials & cuts: 1×8 or 1×10 hardwood; hidden bracket or DIY cleat.
- Joinery & tools: Routed dado to conceal cleat; confirm stud locations.
- Finishing tips: Match wall color or contrast with a natural oil finish.
- Time & difficulty: Half a day; beginner.
7) Entryway bench with shoe cubbies
- Why it’s great: Consolidates coats and footwear in one tidy hub.
- Materials & cuts: 3/4″ plywood carcass; hardwood edge banding.
- Joinery & tools: Pocket holes or dominoes; cushioned top optional.
- Finishing tips: Durable finish that resists scuffs.
- Time & difficulty: 1–2 days; intermediate.
8) Shaker-style wall cabinet
- Why it’s great: Elegant joinery and lots of utility for bathroom or kitchen.
- Materials & cuts: Solid wood stiles/rails; panel door; simple face frame.
- Joinery & tools: Mortise-and-tenon or pocket screws with plugs.
- Finishing tips: Milk paint or clear oil for traditional look.
- Time & difficulty: 1–2 days; intermediate.
9) Under-bed rolling storage drawers
- Why it’s great: Hidden storage for off-season clothes or linens.
- Materials & cuts: Plywood box sized to bed clearance; casters.
- Joinery & tools: Box joints or butt joints with screws.
- Finishing tips: Light seal coat to prevent snagging fabrics.
- Time & difficulty: Half a day per drawer; beginner.
10) Blanket ladder
- Why it’s great: Cozy living room accent that displays throws.
- Materials & cuts: 2 side rails; 4–5 rungs; angled feet.
- Joinery & tools: Dowels or screws with plugs.
- Finishing tips: Stain or whitewash; felt pads on feet.
- Time & difficulty: 2–3 hours; beginner.
Pro tip: If you’re new to cabinetry, a plan set shortens the learning curve. The projects above match well with measured drawings from TedsWoodworking, which can save layout time.
Kitchen and dining projects that shine indoors
Food-centric builds are ideal winter work because they’re compact, useful, and finish-friendly.
11) Serving tray with integrated handles
- Why it’s great: Practice edge banding and handle cutouts; great gift.
- Materials & cuts: Plywood panel core with hardwood rim.
- Joinery & tools: Miters reinforced by splines or biscuits.
- Finishing tips: Durable, easy-to-clean topcoat; felt pads underneath.
- Time & difficulty: Half a day; beginner.
12) Tiered spice rack
- Why it’s great: Increases cabinet visibility; customizable to bottle sizes.
- Materials & cuts: 1/2″ stock or plywood; stepped risers.
- Joinery & tools: Glue and brads or screws; template for repeat cuts.
- Finishing tips: Waterborne poly for kitchen durability.
- Time & difficulty: 2–3 hours; beginner.
13) Countertop wine rack
- Why it’s great: A striking piece from contrasting woods.
- Materials & cuts: Curved or lattice design; 1x lumber.
- Joinery & tools: Hole saw for bottle wells or angled dadoes.
- Finishing tips: Hardwax oil for a low-sheen luster.
- Time & difficulty: Half a day; beginner to intermediate.
14) Bread box or roll-top canister
- Why it’s great: Classic curve and slat work build design skills.
- Materials & cuts: Thin slats for tambour; plywood carcass.
- Joinery & tools: Groove routing, tambour canvas, edge banding.
- Finishing tips: Wipe-on varnish; avoid strong odors inside box.
- Time & difficulty: 1–2 days; intermediate.
15) Tabletop utensil or napkin caddy
- Why it’s great: Organizer for family meals and holidays.
- Materials & cuts: Divided compartments; optional handle dowel.
- Joinery & tools: Pocket screws or brads; chamfer edges.
- Finishing tips: Durable satin poly; add felt feet.
- Time & difficulty: 2–3 hours; beginner.
Safety note: Solvent-based finishes release VOCs. The EPA’s guidance on indoor air quality and VOCs can help you select safer products for winter work.
Gifts, games, and family-friendly builds for cozy evenings
Winter woodworking is the perfect time to make heirloom gifts and games that draw people together.
16) Keepsake box with lift-out tray
- Why it’s great: A small canvas for fine joinery and figure-matching.
- Materials & cuts: Quarter-sawn hardwood; tray dividers.
- Joinery & tools: Box joints or dovetails; hidden hinge optional.
- Finishing tips: Oil-and-wax blend to highlight grain.
- Time & difficulty: 1–2 days; intermediate.
17) Wooden toy cars or building blocks
- Why it’s great: Safe, durable toys from hardwood scraps.
- Materials & cuts: Maple, beech; rounded edges for safety.
- Joinery & tools: Drill press for axle holes; non-toxic glue.
- Finishing tips: Food-safe oil or saliva-safe toy finish.
- Time & difficulty: 2–4 hours; beginner.
18) Chess/checker board with border
- Why it’s great: Teaches panel glue-ups and precision layout.
- Materials & cuts: Alternating light/dark squares; mitered frame.
- Joinery & tools: Crosscut sled for consistent squares.
- Finishing tips: Spray lacquer or wipe-on poly for a smooth playing surface.
- Time & difficulty: 1 day; intermediate.
19) Cribbage board
- Why it’s great: Efficient drill press practice; endless design options.
- Materials & cuts: Single hardwood slab or laminated board.
- Joinery & tools: Drilling jig/template; storage cavity for pegs.
- Finishing tips: Low-build oil or wax; avoid filling holes.
- Time & difficulty: 3–4 hours; beginner.
20) Ring toss or tabletop beanbag game
- Why it’s great: Family fun that stores flat; perfect for snowy nights.
- Materials & cuts: Plywood base; dowel pegs; rope rings.
- Joinery & tools: Simple screws and glue; paint or stain as desired.
- Finishing tips: Durable exterior-grade paint if used seasonally outdoors.
- Time & difficulty: 2–3 hours; beginner.
Looking to turn your winter builds into gifts that sell? Keep notes on your material costs and build times now; they’ll help you price confidently later. For a blueprint on turning a hobby into a side income, see WoodProfits for general guidance on monetizing small woodworking projects.
Shop jigs and upgrades that make indoor work safer and faster
When you can’t swing big outdoor builds, invest in jigs and fixtures that improve accuracy and safety in your indoor shop. These pay dividends on every future project.
21) Table saw crosscut sled
- Why it’s great: Delivers dead-square cuts and safer crosscuts.
- Materials & cuts: Plywood base; hardwood runners; rear/front fences.
- Joinery & tools: Glue and screws; five-cut method to calibrate.
- Finishing tips: Wax the runners and base for smooth travel.
- Time & difficulty: 1 day; intermediate.
22) Miter saw fence with stop block
- Why it’s great: Repeatable lengths for batch projects like shelves and frames.
- Materials & cuts: Plywood or MDF subfence; T-track and flip stop.
- Joinery & tools: Screws; careful alignment to blade.
- Finishing tips: Paste wax on T-track for easy sliding.
- Time & difficulty: 2–3 hours; beginner.
23) Wall-mounted clamp rack and tool wall
- Why it’s great: Frees floor space and speeds up glue-ups.
- Materials & cuts: Plywood backer; dowel or notched arms.
- Joinery & tools: French cleat for flexible mounting.
- Finishing tips: Clear coat to resist glue drips.
- Time & difficulty: 3–4 hours; beginner.
24) Bench hooks, shooting board, or sanding station
- Why it’s great: Hand-tool accuracy and dust control in small spaces.
- Materials & cuts: Plywood and hardwood wear strips; replaceable sandpaper.
- Joinery & tools: Glue and brads; precision layout for fences.
- Finishing tips: No finish needed; wax contact surfaces.
- Time & difficulty: 2–3 hours; beginner.
Tight on room? Dial in a compact, efficient layout and budget-friendly tool choices with UltimateSmallShop – The Next Woodworking Blockbuster!. A smart small-shop setup makes indoor winter work safer and more enjoyable. For more dust-control tips, start with [Dust collection on a budget](INTERNAL LINK PLACEHOLDER) and NIOSH’s guidance on controlling wood dust exposure.
Home office and media pieces for productive hibernation
Remote work and streaming marathons go smoother when your space is tailored to you. These indoor woodworking projects build comfort and organization.
25) Monitor stand and desk riser
- Why it’s great: Improves ergonomics and creates under-monitor storage.
- Materials & cuts: Solid wood or plywood; optional drawer.
- Joinery & tools: Simple butt joints, pocket screws, or dados.
- Finishing tips: Satin waterborne poly to resist scuffs.
- Time & difficulty: 2–3 hours; beginner.
26) Under-desk cable tray and power mount
- Why it’s great: Hides wires and keeps your workspace clean.
- Materials & cuts: Plywood tray; cleats; metal grommets.
- Joinery & tools: Screws and washers; keyhole slots for removal.
- Finishing tips: Light seal coat; label cables before mounting.
- Time & difficulty: 2–3 hours; beginner.
27) Adjustable laptop or book stand
- Why it’s great: Two-piece wedge design or hinged stand for airflow.
- Materials & cuts: 1/2″ stock; slots for angle adjustments.
- Joinery & tools: Dowels, screws, or living-hinge kerfs in plywood.
- Finishing tips: Oil or wax; add cork for grip.
- Time & difficulty: 2–3 hours; beginner.
28) Small media console or end table
- Why it’s great: Practice carcass construction and door/drawer alignment.
- Materials & cuts: Plywood case; hardwood face frame; tapered legs.
- Joinery & tools: Dados/rabbets or pocket screws; adjustable shelf pins.
- Finishing tips: Stain and clear coat; consider cable grommets.
- Time & difficulty: 1–2 days; intermediate.
For long-lasting furniture, choose stable materials and grain orientation that resists seasonal movement. The USDA’s Wood Handbook is a free, authoritative reference on wood properties.
Wall art and seasonal décor to brighten indoor spaces
Finish your winter lineup with creative pieces that transform blank walls and celebrate the season.
29) Geometric wall art panel
- Why it’s great: Eye-catching patterns from contrasting species and offcuts.
- Materials & cuts: Thin strips; chevron or herringbone layout.
- Joinery & tools: Glue-up on plywood substrate; cauls for flatness.
- Finishing tips: Clear oil to pop grain; add a shadow-frame.
- Time & difficulty: 1 day; intermediate.
30) Rustic wall clock
- Why it’s great: Combines woodworking with basic clock hardware.
- Materials & cuts: Live-edge slab or glued panel; center spindle hole.
- Joinery & tools: Forstner bit for movement cavity; French cleat for hanging.
- Finishing tips: Oil or varnish; apply numerals or inlay markers.
- Time & difficulty: 2–3 hours plus finish time; beginner.
31) Perpetual wooden calendar
- Why it’s great: Functional sculpture that rotates through dates forever.
- Materials & cuts: Blocks with laser or router-carved numbers; base stand.
- Joinery & tools: Templates for consistent letter/number sizing.
- Finishing tips: Light oil; crisp painted numerals for visibility.
- Time & difficulty: Half a day; beginner to intermediate.
Decor tip: Mix your handmade pieces with plants and textiles to balance wood tones and soften acoustics—ideal for cozy winter interiors.
How to choose projects and plan winter shop time
Making the most of limited daylight and indoor space comes down to smart planning.
- Batch similar projects: Build frames, coasters, or trays in sets to save setup time.
- Standardize materials: Keep a small inventory of 3/4″ plywood, 1×2 and 1×4 hardwoods, and dowels so you can pivot projects quickly.
- Schedule finishing windows: Plan glue-ups early and finish coats near the end of a session to maximize drying by morning.
- Prioritize dust control: Use a shop vac + cyclone separator and a good mask; see [Dust collection on a budget](INTERNAL LINK PLACEHOLDER) and NIOSH’s wood dust page linked above.
- Document builds: Photograph process, record cut lists, and note improvements. This helps when you repeat builds or decide to sell.
If you prefer following a measured plan to speed prep and reduce mistakes, browse TedsWoodworking for ready-made designs that map closely to the projects in this guide. And if you’re optimizing a tight basement or garage bay, UltimateSmallShop – The Next Woodworking Blockbuster! outlines compact layouts to make indoor work safe and efficient.
Finishing strategies that work well indoors
Cold temps and low ventilation change how finishes behave. A few adjustments go a long way:
- Choose low-odor, fast-curing finishes: Waterborne polyurethane, shellac (dewaxed), and hardwax oils cure faster and smell less than oil-based polys.
- Warm your finish: Store the can at room temperature; cold finish thickens and levels poorly.
- Thin coats, more coats: Light passes with a foam brush or sprayer reduce runs and dry faster.
- Create a drying cabinet: A simple closet or folding greenhouse with a small space heater or incandescent bulb (carefully monitored) speeds curing.
- Check safety data sheets (SDS): Confirm recoat times, flash points, and ventilation needs from manufacturer docs. The EPA’s VOC overview (linked earlier) is a solid primer on indoor air safety.
Conclusion: Your blueprint for 31 indoor woodworking projects to do this winter
Winter is prime time to sharpen skills, build gifts, and upgrade your home—all from the comfort of an indoor shop. From quick coasters and picture frames to storage cabinets, game boards, and precision jigs, you now have 31 indoor woodworking projects to do this winter, along with planning and finishing strategies to keep you building safely and efficiently. When you’re ready to accelerate with step-by-step plans, explore TedsWoodworking; for dialing in a tight workspace, try UltimateSmallShop – The Next Woodworking Blockbuster!; and if you want to turn this season’s builds into a side income, consider the guidance inside WoodProfits.
Build warm, build safe, and enjoy the satisfaction of handmade pieces that will last long past the first thaw.
Frequently asked questions
What are the best woods for indoor winter projects?
Hard maple, walnut, cherry, oak, and beech are stable, readily available, and finish well. For painted projects, select quality cabinet-grade plywood. Avoid wet or construction-grade lumber, which moves more indoors.
How do I manage dust and fumes when woodworking inside?
Use a shop vac with a HEPA filter, a cyclone separator, and a well-fitting respirator. Keep finishes low-VOC and crack a window with a small fan exhausting out.
Can beginners tackle these 31 indoor woodworking projects to do this winter?
Yes. Many projects (coasters, frames, spice racks, cable trays) are beginner-friendly. Start with simple joinery (pocket holes, butt joints) before moving into dovetails, tambours, or furniture carcasses.
What are good finishes for food-contact projects like cutting boards?
Use mineral oil and beeswax or a commercial food-safe oil. Avoid uncured vegetable oils that can go rancid. Let finishes fully cure before use